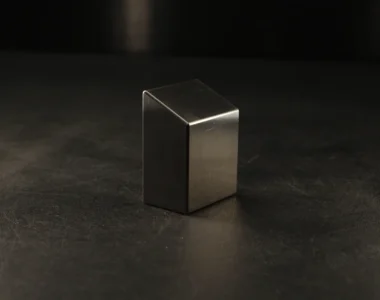
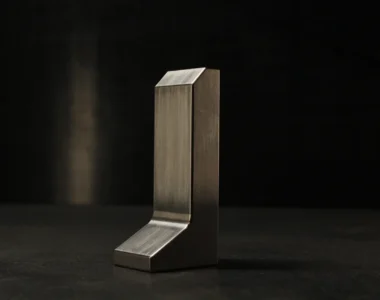
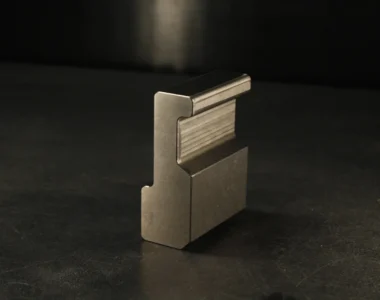
What bucking bar do you need for an RV-14? Almost the whole airframe comes down to two rivet diameters: 3/32 inch and 1/8 inch, in both flush AN426 and universal AN470 heads. A tungsten bar in the 1.5 to 3 lb range covers the 1/8 inch work, a lighter bar in the 1 to 1.5 lb range suits the 3/32 inch work, and a shaped bar handles the spots a straight block cannot reach. That combination gets you through skins, ribs, spars, and control surfaces without buying a bar for every station in the plans.
The RV-14 does not use one rivet size throughout, and it does not use three or four either. Van’s keeps the callouts simple on purpose, which means the bar question is simpler than it looks once you know what to read for.
Read your own rivet callout first
Every hole in your plans has a callout printed next to it, and that callout tells you everything the bucking bar needs to know. AN426AD3 is a 3/32 inch flush rivet. AN470AD4 is a 1/8 inch universal rivet. The third character group is the head style, the number after AD is the diameter in thirty-seconds. A 3 means 3/32 inch, a 4 means 1/8 inch. RV-14 plans stay in that AD3 to AD4 range across the airframe. Earlier Van’s kits used some AD6, 3/16 inch, rivets in heavier fuselage locations, but that size is rare on the RV-14.
This matters more than knowing which specific rivet goes on which specific part, because your build has quick build options, minor plans revisions, and personal changes that shift individual callouts around. The bar decision does not, because it only cares about two numbers: 3/32 and 1/8.
Skins, ribs, and spars: what actually drives the bar choice
Wing and fuselage skins on the RV-14 run mostly 3/32 inch rivets into ribs and stiffeners, with 1/8 inch showing up at spars, doublers, and other structural joints that carry more load. That is the general pattern, not a part-by-part rule, and it holds across most Van’s designs. A bar sized for 1/8 inch work backs a 3/32 inch rivet just fine. A bar sized only for 3/32 inch work will bounce on the bigger rivets and leave you fighting the gun. That is the practical reason most builders land on one mid-weight bar rather than matching a bar to every rivet size in the book.
Control surfaces, elevators, ailerons, rudder, follow the same logic on a smaller scale. The skins are thinner and the rivet spacing is tighter, so access matters as much as weight. A straight bar reaches most of a control surface skin. The trailing edge, the hinge brackets, and the tight rib bays near the root usually need a shaped bar, angled or low profile, to get the face flat against the rivet without gouging the adjacent skin.
Weight still matters on a control surface, just less than on a wing skin. Too much bar in a shallow rib bay is as much of a problem as too little. You end up choosing the shape first, because a bar that cannot physically reach the rivet is no bar at all, and then confirming the weight is enough for the diameter you are driving. Most RV-14 control surface work stays in the 1 to 2 lb range once you have the right shape.
What one general purpose bar covers
One tungsten bar in the 1.5 to 3 lb range, straight, handles the bulk of an RV-14: flat wing skins, open rib bays, fuselage side skins, most of the empennage. That is consistent with what we cover for kit aircraft generally in the Van’s RV and kit aircraft guide, and the exact rivet size to bar weight relationship is worked through in the bucking bar weight guide.
Past that one bar, the upgrades that matter most for an RV-14 build, in order:
- A low-profile or angled bar for spar flanges, rib returns near the root, and lightening hole returns where a straight face cannot sit flat.
- A lighter bar, under 1.5 lb, if you are running a lot of 3/32 inch rivets solo and your arm is the limiting factor rather than the rivet.
- A hook bar for the handful of spots on any kit where the rivet sits behind a flange or inside a channel with no straight approach.
That is three or four bars total for a full RV-14, not the ten or twelve a generic aircraft tool catalog will try to sell you. Our bucking bar kits are built around that same logic, a general purpose bar plus the shapes that cover the real access problems in a kit build.
Why tungsten matters more on a kit build than a production line
A production shop rivets sitting down, with jigs and fixtures holding the work. A kit builder is usually alone, holding the airplane up with one hand and the bar with the other, often overhead or reaching into a wing bay at an angle. The mass has to be there, tungsten heavy alloy runs 2.2 to 2.4 times the density of steel, and the same bucking weight comes in a block small enough to actually fit and hold flat in those positions. That density is how tungsten shows up across aerospace manufacturing more broadly, from production airframe tooling down to the bar in a homebuilder’s hand.
None of that changes how many rivets you drive or how tight the fit needs to be. It changes whether you can hold the bar square for two hundred rivets in a wing without your forearm giving out first. A steel bar heavy enough for the same job runs noticeably bigger for the same weight, and in a wing bay or behind a spar flange, that extra bulk is often the difference between reaching the rivet flat and reaching it at an angle, which is where tipped heads and smiley marks start.
Common questions
What size bucking bar do I need for an RV-14?
Most of the airframe runs on 3/32 inch and 1/8 inch solid rivets, so one straight tungsten bar in the 1.5 to 3 lb range covers the majority of skins, ribs, and spars. Add a low-profile or angled bar for tight flanges and rib returns.
What rivets does the RV-14 use?
Mostly AN426 flush and AN470 universal rivets in AD3, 3/32 inch, and AD4, 1/8 inch, diameters. Read the callout printed next to each hole in your plans for the exact size and head style at that location.
Do I need a different bar for the wings versus the fuselage?
Not usually. The same rivet diameters and head styles repeat across the wings, fuselage, and empennage, so the same general purpose bar and one or two shaped bars cover all three sections.
How many bucking bars does a full RV-14 build need?
Most builders get through the whole kit with three or four bars: one general purpose straight bar, a shaped bar for flanges and returns, and sometimes a lighter bar for extended 3/32 inch work.
Is tungsten worth it over steel for a kit build?
The bucking mass is the same either way. Tungsten packs that mass into a smaller bar, which matters most in the tight, awkward spots a kit build is full of, and for a solo builder holding the bar for hours at a time.